Monday, June 28, 2010

Happy Second Anniversary

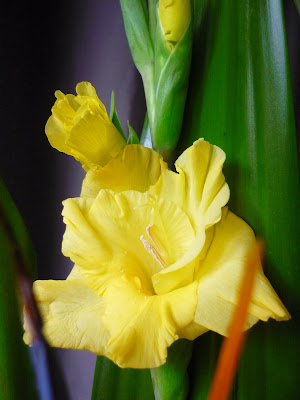
On our second anniversary, Alex bought me a nice pot of flowers as a gift. He usually buys me either red roses or pink lillies and carnations, however, this time he had a more animated selection instead. The multi colour petals form a spectacular combination. It really made my day! In return, I bought him a box of French chocolates. They were made by Pascal Caffet, a top French chocolatier cum a world champion pastry chef. Enjoy the pictures!

The bud arches towards the sunlight


Some nice purple orchids beautifully nestled in between the leaves


Two French lilly buds


Are they related to carnation?


The handsome looking bird of paradise


Smiley face gerbera sunflower


My favourite carnation stood elegantly amongst the bouquet


Some nice looking yellow orchids?


Another beautiful carnation


The sunflower is looking really proud and happy


French lilly looks really elegant when it opens, doesn't it?


Purple flower adds another dimension to the bouquet


Even the bears like to hang around it


So comfy!


Last but not least, my zchocolate specially dedicated to the man I love

Sunday, June 27, 2010

Lemon Lime Sauce

This is an extraordinary sauce with an extraordinary flavour. Alex made this specially to go with the extra large Steggle chicken we roasted together on last Saturday. I truly enjoy the light sweetness from the palm sugar that mingled with a hint of citrusy sourness from the lemon and lime. The sauce is perfect for white meat. Enjoy the simple yet sophisticated recipe!


Lemon Lime Sauce

Apparatus:

Saucepan

Ingredients:

Juice of 1/2 lemon
Juice of 1 whole lime
Lemon and lime zest
2 small cubes of palm sugar
Pinch of salt
1/3 cup of water
Corn flour to thicken

Methods:

1 Place all ingredients in a saucepan. Stir to combine thoroughly.
2 Simmer over low heat for approximately 15 minutes.
3 Place the sauce in a small bowl and cool in the fridge or at room temperature until ready to use.

Friday, June 25, 2010

Coffee Syrup Cake

Who can resist such a sweet temptation like this? Definitely not me! Believe it or not, baking a mudcake wasn't my proposed plan at all. Alex originally ordered a coffee chiffon from me. It was my bad for not listening properly. It was also my bad for making such a beautiful coffee mudcake by mistake. Opps!


Without much references at hand, I had to work on the recipe even more carefully. I estimated the amount of ingredients just right to give a tiny coffee hint, not too overpowering to compromise the overall sweetness of the cake.


This instant coffee bag was one of the dozen sent from Malaysia by Suh Ying, my bestest friend in uni. She claimed that this is the best Kopi O brand she had ever had in Malaysia. So, I believe in her.


After over an hour baking session, the cake turned out nice. Really delicious indeed. Alex would still pefer a stronger coffee aroma but I like it like this myself. If you too are a coffee freak, this is something that you should really try at home then you can make your own justification as to whether you like mine or your own version better.


Take another look at the glossy finishing. Irresistible!


Crunch on the outside. Moist in the middle.


Coffee Mudcake

Apparatus:

Electric mixer
Round cake pan

Ingredients:

(A) dry ingredients:

1 cup self raising flour, sifted
1 cup low GI cane sugar
2 tsp baking powder

(B) wet ingredients:

1 cup grapeseed oil
2 large eggs
1/2 cup chocolate soy milk
1/2 cup coffee water**

Icing:

1 cup icing sugar
1/2 cup coffee water**
2 tbsp margarine
1 tsp vanilla essense

**To make coffee water, add boiled water to instant coffee bag and brew for approximately 10 minutes.

Methods:

1 Preheat oven to 180C. Line and grease a round cake pan.
2 Combine (A) and (B) in two separate bowls. If necessary, beat (B) using an electric mixer until fluffy.
3 Fold a little (B) into (A) at a time, gradually fold in the remaining. Mix until fully combined.
4 Bake at 180C for 30 minutes. Turn off the oven and leave the cake to cook in oven for another 30 minutes.
5 Meanwhile, prepare the icing by combining all ingredients together in a saucepan. Stir on high heat until well combined. Turn the heat down to low upon boiling and keep stirring the mixture until a smooth and thickened paste is formed.
6 Remove the cake from the oven. Cool, then turn out onto a plate or a wire rack.
7 Spread icing over the cake surface and sprinkle a handful of almond nuts to garnish.

Tuesday, June 22, 2010

Banana & Almond Milk Shake


When I was at school or uni, whenever my girl friends and I visited Hudson or Gloria Jeans, I had never missed ordering a glass of chilled milk shake. I liked milk shakes back then and even more so when I grow up. Milk shake is easy and fun to make at home and virtually costs nothing significant to make it. All you need is your own selection of fruit plus ice cream and some milk. Of course you can make it as fancy as you wish by mucking around with the ingredients of your choice. Most of the time, we still prefer using banana.

I used Ciara brand of almond milk in this recipe. I have never heard about this brand before. We randomly selected it from the top shelf of the long life milk aisle and it was marked as clearance stock when we bought it. This product must have been planogrammed so poorly that no one even notice its existence. Although the brand may sound a little dodgy, we still intend to give it a good try. This morning I had a few sips and decided that it tastes fantastic. There is nothing wrong with it at all.

We have tried many different combinations before. This time I am going to make my milk shakes a lot simpler by using only two key ingredients, the banana and the almond milk. Adding ice cream can somehow create a frothy texture. I like it most of the time. Sometimes Alex don't, depending on the flavour I make.

Banana & Almond Milk Shake

Makes 2 milk shakes

Apparatus:

Blender

Ingredients:

1 red tip banana
1 1/2 cup almond milk
2 scoops french vanilla ice cream
1 tsp concentrated vanilla essense

Methods:

1 Blend all ingredients starting from banana then gradually add in other ingredients.
2 Pour into two tall glasses and chill in the fridge for an hour or so.

Friday, June 18, 2010

Cashew Nuts Cookies

Nutty cookies are one of the easiest to make. Traditionally the Chinese use peanuts but I chose to use cashew nuts simply because the long forgotten packet of peanuts had turned soggy sitting in the cupboard. Cashews are what we still freshly left. On our daily routine, we use a lot of cashews in stir-frying dishes and as casual afternoon snacks but very rarely in baking. So this is absolutely my first baking attempt using cashew nuts and I hope they would turn out well.


This packet of salted cashew nuts is a typical Woolworth brand you can easily find in the supermarket. It is a home brand but still expensive to pay. When I bought them, they were already oily and salty so I did not need to use much oil and salt in my recipe. The recipe is by far, as tested before in the peanut version, still fairly simple but great. The only difference I imagine between the two is the end results, i.e. the fragrance, the taste and the texture!


Bear in mind that because cashew nut is double the size of a peanut, the crushing, pounding or grinding job, whichever way it is, should require double the effort. I tried to grind it as fine as I could using the orthodox method, mortar and pestle, but still yielding coarse pieces everywhere. I did not mind a bitey texture at all, I am just surprised to see how challenging it is to make them into a smooth and super fine mixture like what I achieved with the peanuts.


The cookies did not turn out smooth but slightly crumbles. I reviewed my steps and nothing suspicious rang the bell. In fact, like I mentioned before, it could be the cashew nuts had not been ground to perfect. Nevertheless, the end result was still marvelous! The cookies still turned out fine. They still had the crunch on the outside, soft and delicate on the inside. Most importantly, the roasted nutty smell was so fragrant that it still lingered around the kitchen! I was quite excited then I gave Alex a call at work. He (and I) certainly wish the time could fly quicker so we both can enjoy the yummy cookies together.


Despite all the troubles, I still enjoy spending an innovative afternoon to experiment on a new ingredient with an old recipe. I hope Alex will enjoy them when he comes back from work this evening.

Cashew nut cookies

Makes 15

Apparatus:

Mortar and pestle
Baking tray

Ingredients:

3/4 cup salted cashew nuts
1/4 cup brown sugar
1/2 cup plain flour
1/4 cup grapeseed oil
Handful of salted cashew nuts, halved

Methods:

1 Preheat oven to 200C and prepare a well greased and lined baking tray.
2 Grind the salted cashew nuts until fine and place them in a large mixing bowl.
3 Sift in the flour and sugar. Mix them together until well combined.
4 Add a little grapeseed oil into the nut mixture at a time. Knead the mixture with your finger tips until well combined. Gradually add in more oil as needed until you can roll up the mixture into a small ball.
5 Place a half tablespoonful of mixture on your palm at a time and roll them into small balls before placing them on the baking tray.
6 With a chopstick end, press gently on the top of the balls to make a round indents.
7 Place the halved cashew nuts in the middle of indents and bake for 15-20 minutes.

Wednesday, June 16, 2010

About The Blog and Author


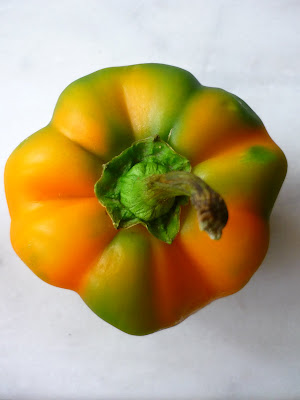
Home cooking is never an expensive indulgence. I didn't realise my extravagant passion about cooking until I met my fiance, Alex, which has driven my kitchen desire further. As our romance blossoms, my patience and dedicacy in preparing a table for two grows even stronger. Yes, our love means everything to me. It changes my life, my preference and my indulgence from top to toe. Like I never liked capsicum before, now I am enjoying it very much.


Living in a western country, it leaves us no choice but to fully exploit the potential of local vegetables and incorporate them into asian cookings. Thanks goodness, though my dishes do not often turn out authentic, Alex is not a fussy eater, so no matter what I make he tries to finish them all. Given the limited variety available, I try to be as creative in my cooking as possible.


To date, my cooking is still amateur and I strive to improve at every opportunity available by learning from other experts. I prefer sourcing my recipes from the online foodie rather than printable cookbooks as I find the latter recipes are often too complicated and confusing to the readers. Sometimes the value of the recipe is far overrated by their rather exaggerating photography. On the other hand, recipes from the foodie are usually well tested and confirmed. Often useful tips are included in the blog posts as well.


For the past couple of years, Alex was very much inspired by my kitchen spirit. He started to hand on the ladle in 2008 and has become more appreciative of the art of cooking since then. Thus far, he has come out with many inspiring ideas to perfectionise our dinners. He made me believes in presentation of a dish is as important as its taste.


Personally, I like asian home cooking utmost but I still attempt to explore other mysterious european or mediterranean flavours as well. Alex, being a half Greek, gives me an even more significant reason to dive into european cooking. Together, Alex and I embark on this journey in search of more innovative food ideas from modern to traditional great recipes. This blog cronicles our culinary adventures. Welcome and thank you for dropping by at our kitchen corner.